Table of Contents
ToggleA disorganized pantry wastes time, money, and kitchen real estate. You reach for flour and find three half-empty bags wedged behind pasta boxes. Canned goods roll to the back and expire forgotten. It happens to most homeowners, but the fix doesn’t require a gut renovation. Smart pantry organization combines practical shelving, clear labeling, and strategic layout so everything you need is visible and accessible. Whether your pantry is a dedicated closet, a corner nook, or a walk-in space, the right approach saves time during meal prep and cuts down on duplicate purchases. This guide walks you through assessing your space, choosing the right storage systems, and creating a layout that actually works.
Key Takeaways
- Assess your pantry’s dimensions and inventory before investing in storage systems to determine the right amount of shelving needed (typically 20–25 linear feet for a household of four).
- Built-in shelves maximize space efficiency and durability for heavy loads, while adjustable metal shelving offers flexibility; a hybrid approach combining both works well for most kitchens.
- Clear labeled containers protect food from pests, prevent waste, and make pantry ideas easier to execute by keeping contents visible and organized by category.
- Organize by food zone with most-used items at eye level (36–60 inches), occasional items on upper shelves, and heavy items on lower shelves for safer, more efficient access.
- Budget-friendly pantry upgrades like DIY shelving, tension rods for dividers, and light paint can transform your space for under $100 without requiring a full renovation.
- Tracking low-stock items with a whiteboard on the pantry door prevents duplicate purchases and ensures you always have essentials available for meal preparation.
Assess Your Current Pantry Space And Needs
Before buying shelves or containers, take a hard look at what you’re working with. Measure the pantry’s height, width, and depth in feet. Note any obstacles, outlets, water pipes, vents, that will affect shelving placement. Open the door and check its swing: some configurations won’t accommodate a full swing-out, which matters for accessibility.
Next, audit your inventory. Pull everything out and sort by category: grains, canned goods, snacks, baking supplies, oils and vinegars, appliances. Be honest about what you actually use. That specialty pasta maker gathering dust? If you haven’t touched it in a year, consider storing it elsewhere. A pantry works best when it holds items you use regularly, not your entire kitchen overflow.
Count how many linear feet of shelf space you need. A typical household of four uses roughly 20–25 linear feet of pantry shelving for regular groceries plus backstock. If you’re a batch cooker or buy in bulk, add another 10–15 feet. This estimate helps you size your shelving solution properly and avoid the cramped-shelf-with-overflow situation that defeats the purpose.
Best Shelving Solutions For Kitchen Pantries
Built-In Shelves Vs. Adjustable Systems
Your shelving choice depends on permanence, budget, and ceiling height. Built-in shelves, typically 1×10 or 1×12 lumber mounted to wall studs, are the most durable and space-efficient option. They’re permanent, support heavy loads (flour sacks, oil bottles), and maximize vertical space. The downside: installation requires finding studs, drilling, and anchoring brackets securely. If your pantry walls are drywall without accessible studs, you may need wall anchors rated for at least 50 pounds per anchor, or you’ll need to locate studs using a stud finder. Built-in shelves also require finishing (paint, stain, or wallpaper) if you want a polished look.
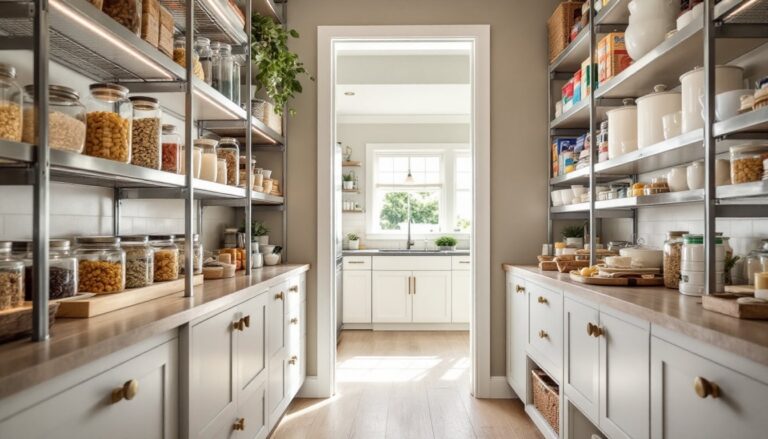
Adjustable metal shelving systems, wire or steel units from hardware stores, offer flexibility without permanent commitment. You can move shelves up or down, add or remove units, and relocate them to another room later. These systems handle most pantry loads well (canned goods, boxed items, lightweight appliances). The trade-off: they don’t maximize space as efficiently as built-ins, and the open-frame design means smaller items can slip through if not contained. Wire shelves also tend to collect dust and crumbs more easily than solid shelves.
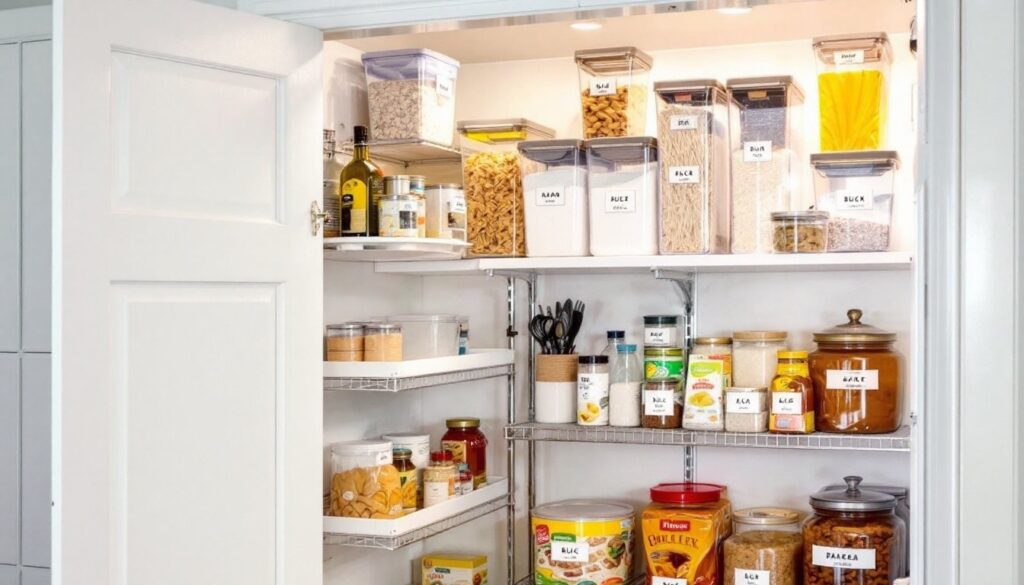
A hybrid approach works well for many pantries: fixed shelves for structural depth and weight, with one or two adjustable shelving units for flexibility. This combines stability and adaptability.
Whatever system you choose, ensure shelves are level and properly fastened. An uneven shelf causes items to roll and creates visual clutter. Space shelves 12–16 inches apart for most groceries: go tighter (10 inches) if storing many small containers, or wider (18–20 inches) if stacking larger items.
Container And Labeling Systems That Work
Clear plastic containers are your pantry’s best friend. They protect food from pests and moisture, make contents instantly visible, and stack efficiently. Buy containers that match your shelf dimensions, tall, narrow ones for pasta and cereal: shallow, wide bins for chips and snacks: square canisters for flours and sugars. Check that lids seal tightly to keep food fresh and pests out.
Label everything, and be specific. “Flour” is fine, but “All-Purpose Flour (expires 12/2026)” is better. Use a label maker or a permanent marker: label makers are worth the small investment because they stay readable and look organized. On each label, include the item name, purchase date, and expiration date if applicable. This prevents the “is this still good?” moment and catches items before they spoil.
For items you grab frequently, cooking oils, vinegars, spices, use a small turntable or Lazy Susan on the shelf. It lets you rotate containers forward to find what you need without pulling boxes in front of them. This is a simple but game-changing detail. Apartment Therapy recommends organizing by frequency of use, which turntables support perfectly.
Consider vertical dividers for baking sheets, cutting boards, and flat containers. They prevent the topple-and-scatter effect that happens when you grab one item from a stack. Even a simple tension rod or a homemade divider from scrap wood works.
Pantry Layout Strategies For Easy Access
Zone Organization By Food Category
Divide your pantry into zones based on how you cook and what you reach for first. Eye level (roughly 36–60 inches from the floor) is prime real estate: store your most-used items here, everyday snacks, oils, frequently used spices, and favorite canned goods. You shouldn’t need a step stool or climb to grab the pasta sauce you use three times a week.
Upper shelves (above 60 inches) work for occasional-use items: specialty flours, formal dinnerware you store in the pantry, backup supplies of things you don’t rotate often. These shelves require a step stool, so don’t stock them with daily essentials.
Lower shelves and the floor are ideal for heavy items (large pasta boxes, bulk rice, pet food) and items used less frequently. Your knees will thank you for not bending constantly, and the weight distribution is safer. Reserve the very bottom shelf or floor space for small appliances you use occasionally, a bread maker, extra blender, or food processor.
Within each zone, group by category: baking supplies together, canned vegetables in one area, snacks in another, oils and vinegars clustered. This creates a mental map. When you need baking soda, you know to look at the baking shelf, not hunt through six shelves. Real Simple offers 20 clever strategies for this kind of logical arrangement.
One more detail: keep a small notebook or whiteboard on the pantry door to track what’s running low. You’ll know to grab flour the next time you’re shopping, and you won’t double-buy items you already have in stock.
Budget-Friendly Pantry Upgrade Ideas
You don’t need a five-figure pantry overhaul. Most improvements come from smart storage choices and intentional organization.
Start with containers you have. Before buying new bins, use mason jars, glass storage containers, and food-safe buckets already in your kitchen. Decant dry goods into whatever seals well. Match your containers later if you want cohesion, but function matters more than aesthetics.
DIY shelving saves money if you’re handy. A set of 1×10 pine boards (roughly $3–5 per 8-foot board, depending on grade) and some shelf brackets ($8–15 per pair) is significantly cheaper than prefab shelving units. You’ll also need a circular saw or miter saw to cut boards to length, sandpaper, and paint or stain. The time investment is an afternoon, and the result is custom-sized shelves for a fraction of commercial costs. The Kitchn has excellent tutorials on DIY shelving if you need visual guidance.
Tension rods (under $10) create instant dividers for upright storage, cutting boards, baking sheets, folders of dry goods. Install two on a shelf, and suddenly you’ve gained organization without a big expense.
Paint or wallpaper the interior walls. Light colors, white, soft yellow, pale gray, make the space feel larger and help you spot items easily. Use moisture-resistant paint if your pantry tends to be humid. A gallon of paint costs $20–40 and transforms a dark, cramped-looking closet into something that feels bigger and fresher.
If your pantry door closes, add adhesive shelving strips or a hanging organizer on the inside. Narrow shelves there are perfect for spices, instant packets, or oils, things that don’t need much depth.
Pantry Organization Pays Off
A well-organized pantry saves time, money, and frustration. You’ll cook more confidently when you know what you have, waste less food because you can see what’s there, and buy more thoughtfully because you’re not replacing items unnecessarily. Start by assessing your space and inventory, choose shelving that fits your needs and budget, and create zones that match how you cook. The effort now pays dividends every time you open the door.