Table of Contents
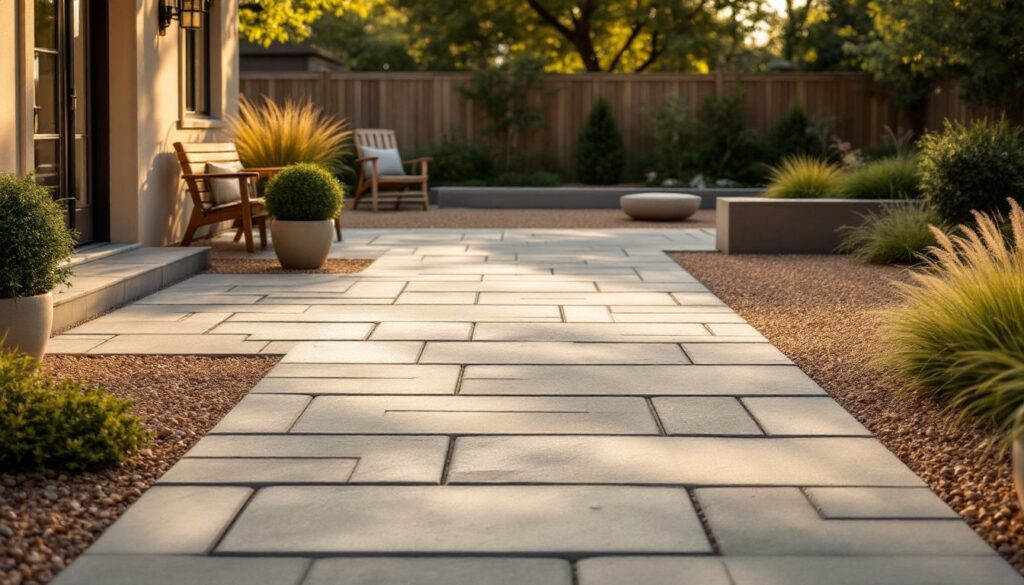
ToggleA pea gravel and paver patio combines the best of both materials, the soft, natural look of gravel with the structure and durability of pavers. This duo isn’t just trending: it’s practical. Pavers handle foot traffic and define spaces, while pea gravel fills gaps, reduces maintenance, and costs far less than a full paver installation. Whether you’re planning a cozy seating area or a full backyard overhaul, mixing these materials gives you flexibility in design and budget. The good news: you can build this yourself with basic tools and careful planning.
Key Takeaways
- A pea gravel and paver patio combines durability with affordability, costing $30–$50 per cubic yard for gravel versus $100+ per square foot for full pavers while providing superior drainage and easier maintenance.
- Pea gravel and pavers work together functionally: pavers define spaces and handle foot traffic, while pea gravel softens the aesthetic, enables water drainage, and prevents frost heave damage.
- Design flexibility ranges from modern minimalist layouts with clean lines and neutral tones to rustic aesthetics with mixed textures, planted borders, and irregular paver patterns.
- Successful installation requires proper prep—a 4–6 inch compacted base layer, sand beds for pavers (not gravel), polymeric sand for joints, and pea gravel spread 2–3 inches deep with landscape fabric underneath.
- A typical 300-square-foot DIY pea gravel and paver patio takes 3–5 days and requires seasonal maintenance like spring raking, annual gravel top-ups every 2–3 years, and occasional weeding.
Why Pea Gravel And Pavers Work Together
Pavers and pea gravel solve different problems, which is exactly why they work so well together. Pavers create defined walkways and seating zones, they’re hardscape anchors that guide foot traffic and prevent wear patterns. Pea gravel (small, smooth stones, typically ½ to ¾ inch) fills the spaces between and around pavers, softening the look and providing drainage.
Drainage is the real win here. Unlike solid patio surfaces, a pea gravel base allows water to permeate rather than pool. This matters in wet climates and prevents the frost heave that can crack solid concrete. The gravel also costs significantly less, you’re paying roughly $30–$50 per cubic yard, versus $100+ per square foot for a full paver patio.
Maintenance is lighter, too. Pavers are set and stay put: pea gravel needs occasional raking and topping off (gravel migrates, especially with foot traffic and weather). But that’s a weekend task, not a structural problem. The combination gives you the formal structure of pavers with the relaxed, natural feel of a gravel garden. You get curb appeal without overdoing it.
Design Styles For Your Pea Gravel And Paver Patio
Modern Minimalist Layouts
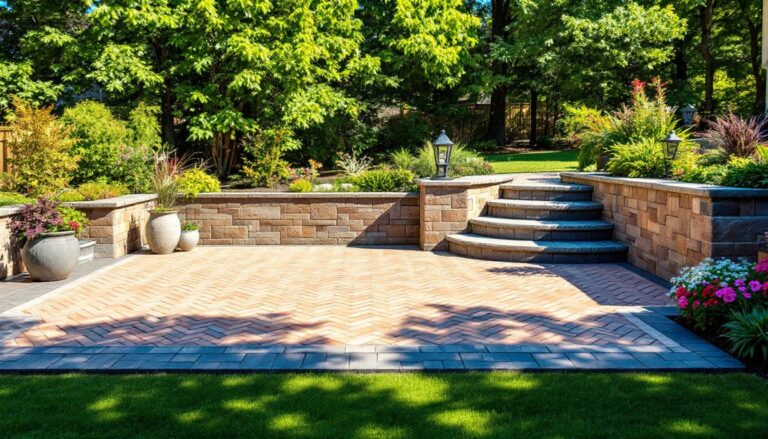
Clean lines and restraint define modern patio design. Use rectangular or square pavers in a single neutral tone, concrete gray, charcoal, or natural stone, and keep pea gravel as the secondary filler material. Linear patterns (running bond or stack bond) feel intentional without being fussy.
Keep plantings sparse: a few architectural shrubs or ornamental grasses in pots, not garden beds. Stick to two colors maximum (pavers + gravel). Low-voltage LED lighting along paver edges adds function without clutter. This style works especially well in smaller yards because it feels organized rather than cramped.
Rustic And Natural Aesthetics
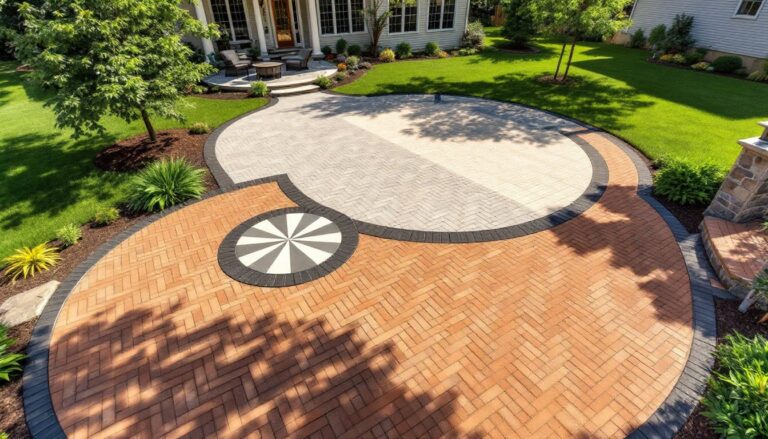
Rustic patios celebrate mixed textures and irregular spacing. Choose tumbled or aged pavers in warm tones, terracotta, rust, cream, and let the pea gravel dominate visually. Patterns can be looser: herringbone, random ashlar, or simply scattered stepping stones through gravel.
Plant generously around the edges, native plants, perennials, herbs. Gardenista has documented nine specific pea gravel patio ideas that blend pavers with plantings for texture and depth. Consider adding a gravel border or dry-laid stone edging to contain the material. Southern Living’s outdoor living guides showcase regional approaches to porch and patio design that often incorporate gravel and natural stone combinations. Weathered wood furniture and potted plants reinforce the unpretentious feel.
Planning And Layout Tips
Start with a rough sketch, no need for CAD, just paper and a pencil. Measure your yard’s length, width, and note existing features (trees, fences, utilities). Pavers typically come in standard sizes: 12×12 inches, 24×24 inches, or 12×24 inches (nominal dimensions: actual is ⅛ inch smaller).
Decide on paver-to-gravel ratio. A 70/30 split (pavers dominant) feels more structured: 40/60 looks gravel-heavy and natural. Account for a 4–6 inch base of compacted gravel beneath everything for drainage and stability. Mark utilities before digging, call 811 in the US.
Order 10% extra material for waste and future repairs. Gravel spreads at roughly 100 square feet per cubic yard at 2 inches depth (common depth for pea gravel). Visit local suppliers in person if possible: colors vary, and seeing samples in daylight beats ordering online. Plan your layout so you’re not cutting many pavers, cuts waste material and time.
Installation Best Practices
Prep is everything. Remove turf, roots, and debris down to bare soil. Compact the base layer (clay or native soil) with a hand tamper or plate compactor. Add 4–6 inches of compacted crushed gravel (not pea gravel, use angular stone that locks together). This is your drainage and leveling layer: skimp here and your patio will settle unevenly.
Set pavers on 1–2 inches of sand bed, not gravel. Sand allows fine adjustment for height and slope: gravel is unstable. Use a straightedge and level frequently, aim for a very slight slope (1/8 inch per linear foot) away from structures for water runoff.
Brush polymeric sand into paver joints, not regular sand. It hardens slightly when wet, reducing migration and weed growth. Once pavers are set and joints are sealed, spread pea gravel in the surrounding areas to a depth of 2–3 inches. Use landscape fabric underneath to reduce weeds (though you’ll pull weeds anyway, it’s a gravel patio, not a sealed system).
Wear safety gear: work gloves, eye protection when cutting or grinding pavers, and a dust mask when spreading gravel. If your project involves structural changes (moving utilities, building a raised edge, or heavy excavation), hire a professional or get a permit. A typical 300-square-foot patio takes a strong DIYer 3–5 days.
Maintenance And Seasonal Care
Pea gravel needs raking every spring and fall to smooth ruts and redistribute displaced material. Hose it down occasionally to settle dust, no special cleaner needed. Plan to add a fresh 1–2 inch layer of gravel every 2–3 years, depending on foot traffic and weather. Budget $20–$40 per 100 square feet for top-ups.
Pavers are nearly maintenance-free. Sweep debris regularly, and pressure wash once a year on a low setting (high pressure can displace sand from joints and damage soft stone). Polymeric sand won’t wash out easily, but don’t abuse it. In freeze-thaw climates, check pavers in spring for frost heave: reset any that’ve popped up.
Weeds will grow through pea gravel. Country Living’s gardening resources cover landscape maintenance strategies that apply to gravel areas. Hand-pull young weeds before they set seed, or spot-spray with herbicide (follow label instructions and keep runoff away from beds). Landscape fabric under gravel helps but isn’t a cure-all. Consider it part of the charm, this isn’t a sealed, maintenance-free surface. That trade-off is why the material costs so much less and feels so good underfoot.