Table of Contents
ToggleA fire pit transforms your backyard into a gathering space, the kind of place where neighbors linger longer and family conversations stretch late into evening. Building one from natural rock is more achievable than most homeowners think, and it’s cheaper than you’d expect if you source materials locally. Whether you’re working with fieldstone, river rock, or boulders from your property, a natural rock fire pit design blends durability, aesthetics, and genuine DIY satisfaction. Here are seven creative approaches to fit different landscapes, skill levels, and budgets.
Key Takeaways
- A classic stone ring fire pit is the simplest DIY approach, requiring no mortar or excavation and working on any level ground with budget-friendly local materials.
- Natural rock fire pit designs range from basic circular rings to integrated bench seating and sunken pits, each suited to different skill levels, landscapes, and budgets.
- Proper fire safety clearances (10 feet minimum from structures), adequate drainage, and solid base preparation are critical factors that determine whether a DIY fire pit succeeds or fails.
- Stacked boulder and layered stone designs deliver dramatic visual appeal by using mixed stone sizes and local materials, making your fire pit feel intentional and authentic to your landscape.
- Integrate bench seating directly into your stone ring using flat stones on two sides to maximize yard efficiency and transform your fire pit into a defined outdoor entertaining space.
- Before building a sunken rock fire pit, check local building codes and verify your soil drains well; if not, install perforated drain pipe to prevent muddy, waterlogged conditions.
Classic Stone Ring Fire Pit
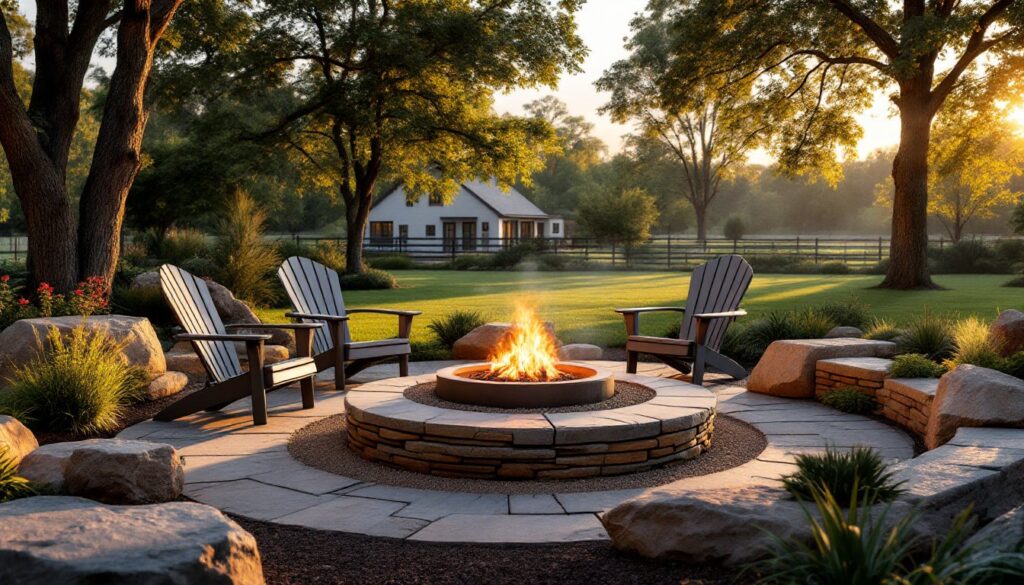
The simplest approach, a circular or oval ring of stacked stone, works on almost any level ground. This method requires no digging, minimal prep, and uses stone as both structure and aesthetic anchor.
Start by clearing a 6- to 8-foot diameter area down to bare soil, removing grass and roots. Rake the spot level and compact it gently: use a hand tamper if the ground feels spongy. Lay out a 2- to 3-foot wide band of landscape fabric to define the perimeter and prevent weeds from creeping back.
Source flat-sided stones in the 12- to 18-inch range (actual size varies by stone type, flagstone, slate, and cut limestone work best). Stack them 18 to 24 inches high, staggering joints like brick. Don’t use mortar: the weight and friction hold them in place. Backfill the interior with gravel or pea stone to create a level base for your fire grate or cast iron ring.
For fire safety, keep the ring at least 10 feet from structures, fences, and overhanging branches. The National Fire Protection Association (NFPA) recommends this clearance for uncontained burns. Interior diameter should be 3 feet minimum to allow a usable fire without excessive heat radiating sideways. This design suits tight budgets and rental situations, it’s removable if you ever relocate the stones.
Stacked Boulder Fire Pit
If you’ve got large, irregular boulders on your property (or can source them affordably from a landscape supplier), stacking them creates dramatic visual weight and feels less finished than a ring, perfect for rustic yards.
Boulders are heavy: a 2-foot granite or river rock boulder typically weighs 300 to 500 pounds. You’ll need help moving them, rent a hand truck or small excavator if you’re stacking more than three stones high. Never try this solo.
Choose boulders with relatively flat bases, and lay them on a 4-inch compacted gravel bed (this prevents frost heave and settling). Stack two to three layers high, keeping larger stones at the base. Avoid stacking more than 4 feet, the center of gravity becomes precarious, and toppling risk increases. Wedge smaller stones or shims between courses to level each layer: irregular stacking actually looks better than perfect alignment.
Leave a 3-foot-wide opening on one side for tending the fire. Backfill the interior with sand and gravel, and set a steel fire ring on top to contain ash and coals. This approach is popular in cottage or mountain retreats and appears in Country Living’s rustic design features, expect to spend more on materials and rental equipment than a simple ring, but the result feels intentional and substantial.
Sunken Rock Fire Pit
Sunken pits sit below grade, which lowers the visual profile, reduces wind exposure, and creates an intimate seating arrangement. The trade-off: excavation labor and drainage complexity.
A sunken fire pit works best on well-draining soil. If your yard holds water after rain, skip this design or install a drain line (discussed below). Excavate a 4-foot-diameter circular hole, 2 to 2.5 feet deep. Slope the walls slightly inward as you dig, not sheer walls, which invite collapse.
Excavation and Drainage Basics
After excavating, inspect the exposed soil. If it’s dark and wet-smelling, you have a drainage problem. Lay 4-inch perforated drain pipe around the pit perimeter, 6 inches from the stone ring’s outer edge, sloping gently toward a lower area or a sump. Cover the pipe with landscape fabric, then gravel, before backfilling. Without drainage, your pit becomes a muddy mess after rain.
Stack your stone ring around the pit edge, boulders or stacked flat stones both work. The interior wall can be left bare soil or lined with additional stone for stability. Backfill the pit interior with 4 inches of gravel, then sand. Create a slight crown in the center so standing water doesn’t pool under your fire grate.
Local building codes vary on pit depth and setbacks: check with your municipality if the pit is large or near property lines. A sunken pit demands more effort but delivers excellent ambiance and naturally contains embers. Homeowners who’ve tackled projects like stone landscaping and patios find the prep work pays off in longevity.
Rustic Layered Stone Design
For a designer look without professional stonework costs, use mixed stone sizes in intentional bands. Think variegated geology: large base stones, medium-sized banding, and small detail stone on top.
This approach requires slightly more thought than a simple ring but yields higher visual impact. Start with your largest stones (18 to 24 inches) as the first course, setting them on a compacted gravel base. Backfill behind them as you build. Layer medium stones (10 to 15 inches) above, rotating their orientation so the pattern doesn’t look repetitive. Top with 3 to 4 inches of smaller flat stone, slate chips or flagstone scraps work, to create a clean upper edge.
The randomness is the point: irregular sizing and color variation make it look like you’ve simply stacked what nature offered, not assembled a kit. Use local stone (limestone, shale, granite) rather than imported slate or flagstone: it’s cheaper and reads more authentically in your landscape.
This design suits yards with existing rock outcroppings or properties where you’re already moving or clearing stone. It takes longer to source and stack than a uniform ring, but labor is still DIY-friendly. Keep interior diameter around 3.5 feet to balance scale and functionality. The layered effect also hides mortar lines if you decide later to point joints for added durability.
Rock Bench Fire Pit Seating
Integrate seating directly into the stone ring by stacking wider, flatter stones on one or two sides as benches. This maximizes yard efficiency and creates a defined social space.
Build your stone ring as normal, but on the north and south sides (orienting away from the main sun direction), stack larger, flatter stones horizontally at 18 to 20 inches high. These “seat stones” should overhang the ring by 2 to 3 inches to create a clean edge. Use stones 24 to 36 inches wide and 12 to 15 inches deep. Backfill behind them with gravel to lock them in place.
Think of bench stones as your widest, flattest pieces, river rock doesn’t work here: you need shape stability. Slate, flagstone, or cut sandstone are ideal. Test each stone for wobble before finalizing placement. A wobbly bench ruins the experience and is a liability if someone falls.
Add a steel fire ring or grate inside so ash doesn’t dust your seating. Benches work especially well in a sunken pit design, where the integrated seating feels built-in rather than retrofitted. This approach suits larger yards (minimum 12-foot diameter for a pit with bench seating on two sides) and appeals to homeowners treating the fire pit as a focal point for entertaining. You’ll see this integrated seating in Gardenista’s premium backyard designs, it’s the detail that elevates a fire pit from project to outdoor room.
Conclusion
Building a natural rock fire pit is an afternoon-to-weekend project that rewards you with a lasting gathering place. Start simple if you’re unsure: a classic ring requires only stone, a level site, and a clear head about fire safety. Scale up to integrated benches or sunken designs once you’ve got the basics down. Whatever design you choose, prioritize safety clearances, drainage, and solid base prep, that’s where most DIY fire pits succeed or falter. Your backyard will thank you.