Table of Contents
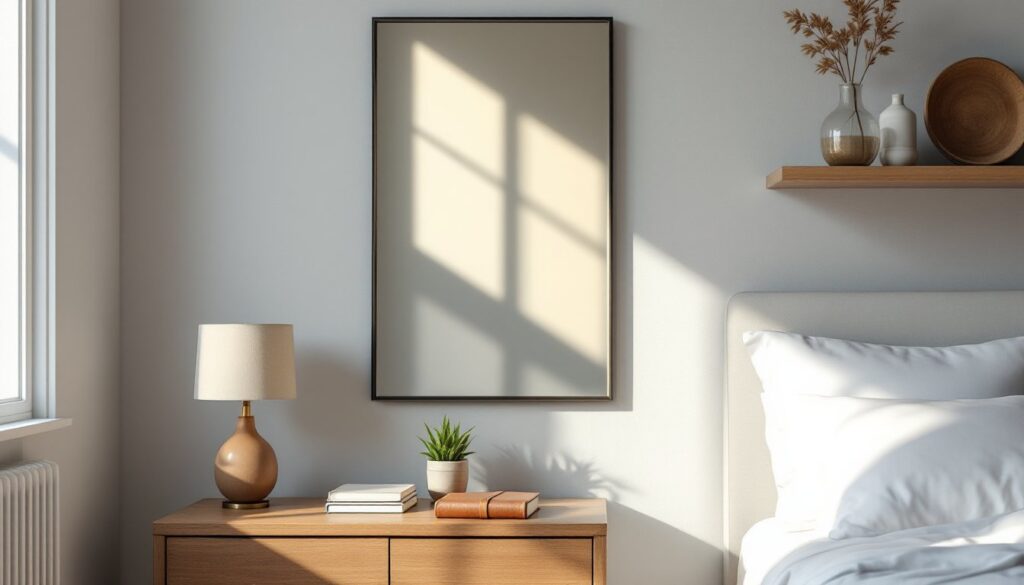
ToggleA mirror behind your nightstand is one of the smartest space hacks for a cramped bedroom. It bounces light around the room, makes walls feel further away, and gives you a functional dressing area without eating floor space. Whether you’re working with a shoebox studio or a modest master bedroom, adding a mirror behind your nightstand combines practicality with a subtle design punch. This guide walks you through real installation options, frame styles, and the lighting tricks that make the whole setup work, no contractor required.
Key Takeaways
- A mirror behind your nightstand expands perceived bedroom space by 20–30% while reflecting light into dark corners, making it ideal for cramped bedrooms without requiring expensive renovations.
- Wall-mounted mirrors should be mounted 48–60″ from the floor using heavy-duty anchors rated for 50+ pounds, and always located over wall studs to ensure safety and stability.
- Pair your mirror with warm-toned wall sconces positioned 24–36″ from the mirror’s center at approximately 60″ from the floor to create shadow-free, flattering lighting that maximizes the reflective benefits.
- Floating shelves with integrated mirrors offer dual functionality by combining storage and light reflection, but require structural-grade hardware and proper stud placement to handle cantilevered weight safely.
- Frame choice sets the room’s tone—minimalist metal frames work for modern spaces, wooden frames suit traditional styles, and a single large mirror reflects more light and makes a bolder statement than multiple smaller pieces.
- For renters, adhesive strips rated for 20+ pounds or leaning mirrors with bottom brackets provide temporary alternatives that preserve security deposits while maintaining most design benefits.
Why Add a Mirror Behind Your Nightstand?
A mirror positioned behind or above your nightstand does double duty: it expands the perceived size of your bedroom and reflects natural light back into dark corners. Studies in interior design confirm that reflective surfaces make tight rooms feel 20–30% more spacious. You also get a hands-free way to check your appearance while getting ready for bed or right after waking up.
Beyond optics, a mirror saves you from installing a separate vanity or dresser, which is crucial when square footage is limited. It’s also far cheaper than a bedroom renovation. Most homeowners can add a wall-mounted mirror for under $200 in materials and a couple hours of labor. The installation doesn’t typically require permits, it’s a straightforward mounting job, though you’ll want to locate studs or use proper wall anchors for anything larger than a small decorative piece.
Wall-Mounted Mirrors for Compact Bedrooms
Wall-mounted mirrors are the go-to for tight spaces because they don’t steal floor real estate. A 36″ × 24″ mirror is standard for a nightstand setup: it’s large enough to reflect a decent area but not so oversized that it dominates a small wall.
Measure twice before you drill. Mark the wall with a pencil at the height where you want the mirror’s center, typically 48–60″ from the floor so you see your upper half and face clearly. Use a stud finder to locate wall framing. If there’s no stud where you want to mount, use heavy-duty toggle bolts or molly anchors rated for 50+ pounds. Standard drywall anchors won’t cut it: a mirror weighs more than you’d think, and a falling mirror creates serious safety and injury risks.
For installation, use a power drill with a small bit to start your holes, then switch to the anchor size recommended by the hardware manufacturer. Mount the mirror’s bracket or French cleats securely, and always have a second person help you lift and align it. Confirm it’s level with a 4-foot spirit level before fully tightening.
Floating Shelves With Integrated Mirrors
If you want to combine storage and reflection, floating shelves with a mirror backing or a shelf-and-mirror combo unit are solid choices. These let you display a small lamp, a few books, or a plant while the mirror does the visual lifting.
Floating shelves need serious support because they’re cantilevered (unsupported on one end). Install heavy-duty shelf brackets rated for at least 50 pounds, more if you plan to load them down. Again, find the studs and use 3/8″ lag bolts or structural-grade hardware. A mirrored backing panel (typically ¼” plywood with reflective adhesive film or a thin mirror) attaches to the wall, then the shelf mounts in front or beside it. This setup gives you both function and the light-bouncing benefit of a mirror. Many modular floating shelf systems come pre-drilled and include a mirror insert: these simplify the math, though they’re a bit pricier upfront.
Styled Mirror Frames and Design Options
Your frame choice sets the room’s tone. A minimalist black metal frame reads modern and pairs well with contemporary bedrooms, while a wooden frame in natural or stained finish brings warmth and works across farmhouse, rustic, or traditional styles. Contemporary designers often use brass or gold frames for a touch of luxury without the bulk.
Frameless mirrors are another popular route, they mount directly to the wall and feel clean and unobtrusive. The downside is they can look sterile in smaller spaces: adding a frame, even a thin one, creates visual interest. Many home improvement sites like Homedit showcase how frame color and finish transform the same mirror into wildly different aesthetics.
Size matters too. A single large mirror (36″ × 48″ or bigger) makes a bolder statement and reflects more light than three smaller mirrors. If you go the multi-mirror route, say, three 16″ × 20″ pieces arranged in a grid, use mirror adhesive or French cleats for each one and ensure they’re level relative to each other. Uneven mirrors look sloppy and defeat the design purpose.
Consider a beveled edge mirror if your budget allows. The angled edges catch and diffuse light beautifully, adding dimension. A standard flat mirror works fine too: don’t overspend on beveling if you’re tight on cash.
Lighting and Reflective Combinations
A mirror without good lighting is like a car without headlights. The real magic happens when you pair your mirror with soft, well-placed light. A warm-toned wall sconce (2700K color temperature) mounted on either side of the mirror creates shadow-free lighting for grooming and makes the mirror’s reflective surface pop without creating glare.
Position sconces at approximately 60″ from the floor, just above eye level, and space them **24–36″ from the mirror’s center on each side. This three-point lighting setup (mirror + two sconces) feels balanced and is forgiving to most face shapes. Battery-powered LED sconces work in rental situations where you can’t wire in permanent fixtures.
Interior design inspiration sources like MyDomaine emphasize that layered lighting (ambient, task, and accent) transforms small rooms. Pairing your mirror with a bedside lamp and a ceiling fixture creates flexibility: bright light for getting ready, dimmed for relaxation. Keep the mirror’s frame out of the direct lamp beam if possible: you want the mirror itself to be a light-bouncing tool, not a heat sink.
For renters or temporary setups, consider a clip-on lamp that attaches to your mirror’s frame or shelf. It’s portable, doesn’t require wiring, and you take it with you when you move.
Installation Tips and Space Planning
Before you mount anything, measure and mock it up. Use painter’s tape to outline the mirror’s footprint on the wall. Step back and live with it for a day, check sight lines from the bed, the door, and the dresser or desk. The mirror shouldn’t dominate the room or create awkward reflections of clutter.
Clear the wall of any obstacles. If you have a power outlet behind where the mirror will go, no problem, the mirror can sit in front of it (you won’t access it anyway). Wall studs, on the other hand, should be located before drilling. A magnetic stud finder costs $15 and saves you from drilling into pipes or electrical conduit. Mark studs with a pencil.
When fastening, use the smallest holes possible. Pilot holes reduce the risk of cracking drywall or the mirror itself. Screw anchors in slowly and don’t over-tighten: you just need the mirror to stay put, not a death grip. Use a cordless drill-driver set to low torque for this reason.
If your nightstand is tall and narrow, a tall vertical mirror works best. If it’s short and squat, a horizontal mirror feels more balanced. The mirror doesn’t have to be exactly the same width as the nightstand, it’s fine if it’s wider or narrower. Real rooms look best when proportions are intentional, not accidental. Think about traffic flow: a mirror shouldn’t stick out so far that it becomes a head-bumping hazard in a tight walkway.
For renters, avoid permanent installation. Use heavy-duty adhesive strips rated for 20+ pounds, or a leaning mirror against the wall with a small bracket at the bottom for stability. You lose some of the “integrated” feeling, but you get your security deposit back.
Conclusion
A mirror behind your nightstand is a low-cost, high-impact upgrade that works in any bedroom size. Whether you choose a single large framed mirror, floating shelves with a mirrored backing, or a multi-piece arrangement, the payoff is instant: a brighter, more spacious-feeling room plus a practical grooming station. Proper installation, finding studs, using rated hardware, and enlisting a helper, takes an afternoon and pays dividends for years. Take your time with measurement and alignment: a crooked mirror screams “rushed DIY,” while a level, well-lit one feels intentional and polished. House Beautiful and similar design resources offer endless inspiration for frame styles and layouts. Start with your dimensions and your lighting setup, then choose a frame that matches your room’s vibe. You’ve got this.