Table of Contents
ToggleA mosaic tile backsplash transforms a kitchen from purely functional to genuinely striking. Whether you’re drawn to the sun-soaked warmth of Mediterranean aesthetics or the clean lines of contemporary design, mosaic tiles offer flexibility that few other materials can match. They work behind ranges, above islands, or across an entire wall, and they’re forgiving enough for a dedicated DIYer to tackle. This guide walks through five distinct mosaic styles, plus installation and care tips, so you can choose the right look and pull it off cleanly.
Key Takeaways
- A mosaic tile backsplash transforms your kitchen’s appearance while offering flexibility across five distinct styles—Mediterranean, geometric, hand-painted, glass, and metal combinations.
- Proper surface preparation, dry-layout planning, and correct trowel technique are critical to successful DIY mosaic tile backsplash installation.
- Mediterranean mosaics use 1–2 inch ceramic tiles with wider grout joints (3/16 inch or wider) and darker grout colors to hide stains and emphasize pattern.
- Hand-painted tiles require delicate handling with smaller 1/4-inch notched trowels and cost $8–$20 per tile, but create one-of-a-kind backsplash designs when mixed with solid complements.
- Glass and metal mosaics need non-sanded grout, materials rated for these finishes, and proper fire-rated substrates if installed near cooktops.
- Long-term backsplash care involves sealing grout within 72 hours, wiping splatters promptly with mild soap, and avoiding acidic cleaners on natural stone or hand-painted tiles.
Classic Mediterranean Mosaic Designs
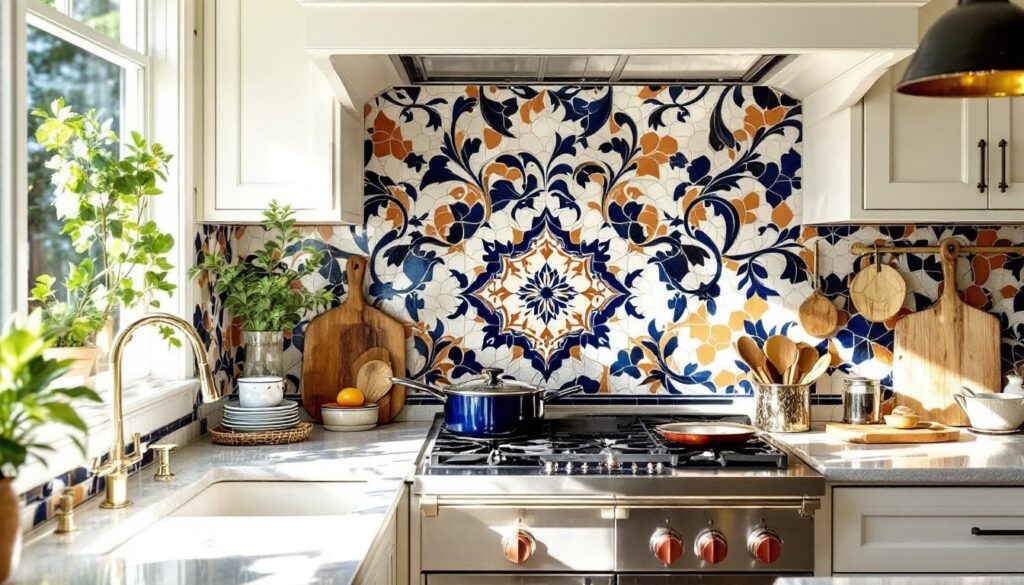
Mediterranean mosaics bring Old World charm into modern kitchens. Think terra-cotta, cobalt blue, and cream tones arranged in organic, hand-placed patterns. These designs often feature smaller ceramic or glass tiles (typically 1–2 inches) interspersed with grout lines that become part of the visual rhythm.
The beauty of Mediterranean mosaics lies in their apparent casualness, yet they’re carefully composed. Designs often center around a focal tile (sometimes a hand-painted accent piece) surrounded by complementary solid colors. Glazed ceramic tiles dominate this style because they’re durable, heat-resistant, and easy to wipe clean. Look for tiles rated for backsplash use (not flooring-grade, which can be too porous).
One practical tip: Mediterranean mosaics benefit from slightly wider grout joints (3/16 inch or wider) to emphasize the pattern. Darker grout colors (charcoal, taupe) hide stains better than white, though they’re less forgiving if you need to match repairs later. Plan your layout before you buy: full-spread installations of 100+ tiles need precise measurement to avoid cutting mid-pattern and wasting material.
Modern Geometric Mosaic Patterns
Geometric mosaics speak to homeowners seeking a contemporary edge. Hexagons, diamonds, and interlocking patterns in monochrome or two-tone palettes create visual interest without the color saturation of Mediterranean designs. Many modern installations use larger format tiles (up to 4 inches) arranged in repeating geometric sequences.
Glass and ceramic blends work particularly well here. Frosted or matte finishes reduce glare, which matters if your kitchen gets direct morning sun. Geometric patterns demand precision, use a laser level and dry-lay your entire design before applying thinset. Misalignment of even 1/8 inch compounds across a wall and becomes visually obvious.
One trend gaining traction is the “subway-scale” hexagon (roughly 2×2 inches) arranged in offset rows, similar to classic subway tile but with contemporary geometry. Grout color choice matters more in geometric designs: light grout on dark tiles can create a gridded effect, while matched grout blends the tiles into a unified surface. Decide which direction you want your eye to travel and choose grout accordingly.
Colorful Hand-Painted Tile Arrangements
Hand-painted tiles inject personality and artisanal character into a backsplash. Portuguese, Spanish, and Mexican traditions produce stunning glazed ceramic tiles with botanical, geometric, or figurative designs. Each tile is unique, which means your backsplash becomes a true one-of-a-kind feature.
Hand-painted tiles are delicate, literally and functionally. Most are thinner than standard tiles, requiring gentler handling during installation. Use a notched trowel no larger than 1/4 inch (not 3/8 inch, which is standard) to avoid squishing the glaze. Seal grout joints promptly: porous grout will stain alongside colorful tiles, and bleach is off-limits for cleanup.
Source hand-painted tiles thoughtfully. Regional producers differ in durability: Portuguese tiles tend toward highly glazed finishes that resist moisture, while Mexican earthenware may be more porous. Budget accordingly, hand-painted tiles run $8–$20 per tile versus $1–$3 for basic ceramic. Plan a layout that minimizes cutting: many artisanal tiles crack unpredictably under a wet saw. Mixing hand-painted focal tiles with solid complements stretches your budget without sacrificing impact.
Glass and Metal Mosaic Combinations
Glass and metal tiles create sophisticated, reflective backsplashes ideal for smaller kitchens or those needing extra light bounce. Frosted glass, clear glass, and brushed copper or stainless-steel tiles layer depth and luminosity behind task lighting. These materials are inherently less porous than ceramic, which simplifies cleaning.
The downside? Glass and metal conduct heat. Don’t use pure glass backsplashes directly behind open flames or high-heat cooktops without a fire-rated substrate underneath (consult your local building code). Many municipalities require cement board or specially rated drywall, not standard drywall, behind cooktops. Metal tiles can also show fingerprints: brushed finishes hide marks better than polished.
Installation requires a softer touch. Glass can crack if trowel pressure is uneven. Use premixed, non-sanded grout (sanded grout can scratch glass surfaces). Thin-set for glass and metal differs from ceramic, look for varieties specifically rated for these materials. Expect to pay $3–$8 per tile and budget extra time for careful layout and curing.
Installation Tips for DIY Success
Success hinges on three things: surface prep, layout, and technique. Start by removing existing backsplash and inspecting the wall for studs, moisture, and levelness. Walls are rarely perfectly level: your eye forgives a slight tilt, but backsplashes expose imperfection ruthlessly.
Surface Preparation: If installing over drywall, apply a waterproof membrane (such as a backsplash primer or thinset additive) to protect against splashes. For new drywall, ensure it’s green (moisture-resistant) board, not standard white board. Sand any high spots with 120-grit sandpaper. Vacuum thoroughly, dust prevents thinset from bonding.
Layout & Spacing: Dry-lay your entire backsplash without thinset. Mark the center point and work outward to minimize partial tiles at edges. Use tile spacers (most mosaics benefit from 3/16-inch or 1/4-inch spacers) to maintain consistency. Mark a horizontal reference line with a chalk line: even a 1/8-inch drift becomes obvious after 3 feet.
Application: Comb thinset with a notched trowel at a 45-degree angle to create uniform ridges. Press each tile with a slight twisting motion. Check every few tiles with a level. Mix only as much grout as you can use in 15 minutes: it hardens quickly. Grout after thinset fully cures (typically 24 hours). Apply grout with a rubber float at a 45-degree angle, forcing it deep into joints. Wipe excess with a damp sponge 10–15 minutes later, before it hardens.
Safety: Wear dust masks when cutting tiles (silica hazard), safety glasses, and nitrile gloves. Tile shards are sharp.
Maintenance and Long-Term Care
Mosaic backsplashes are durable, but they’re not maintenance-free. Sealed grout resists staining: unsealed grout absorbs oils and discolors. If you installed with standard grout, consider applying a grout sealer after full cure (check the manufacturer’s timeline, usually 72 hours to a week).
Day-to-day care is straightforward. Wipe splatters with a damp cloth and mild dish soap. Avoid acidic cleaners (vinegar, lemon) on certain tile types, especially natural stone mosaics, which can etch. For stubborn grout stains, a soft brush and oxygen-based cleaner (like OxiClean diluted per instructions) works better than bleach, which can discolor grout and tile.
Glazed ceramic and glass are nearly bulletproof. Unglazed or hand-painted tiles need gentler treatment. If a grout joint cracks or a tile chips, address it promptly to prevent water infiltration behind the backsplash. Small tile repairs are straightforward, remove failed grout with a grout saw, chip out the damaged tile with a cold chisel, set a replacement with fresh thinset, and regrout. Keep leftover tiles and grout samples in a labeled box for exactly this reason.
Inspiration doesn’t have to come from magazines alone, Houzz’s gallery of kitchen designs showcases real installations across styles and budgets. For kitchen-specific design conversation, The Kitchn covers appliances and spatial decisions that influence backsplash choices. If you’re planning a broader remodel, Remodelista’s sourcebooks curate real products and design decisions.
Conclusion
A mosaic tile backsplash rewards careful planning and honest execution. Pick a style aligned with your kitchen’s light, architecture, and your tolerance for pattern. Invest time in layout and surface prep, they determine success more than fancy tools. Whether you choose Mediterranean warmth, geometric precision, hand-painted character, or reflective glass, the result is a backsplash that functions beautifully for years and genuinely reflects your home.